Nov 01 , 2018
How to Care for Your Under-Sink Water Filter
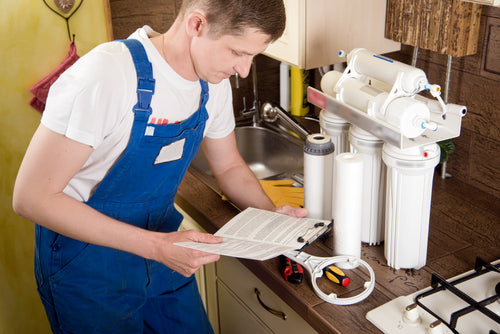
Many households are installing water filters to assure they have clean drinking and cooking water. A popular filter system option for homes is the under sink water filter. It takes up space in the cabinet under the sink but is still conveniently out of the way. Like all filter systems, it will require occasional maintenance, and replacing the filter is a simple procedure.
Gather Your Supplies
You do not need many tools. A filter wrench is recommended to make removing the canister housings easy. The housings can be removed by hand or with another tool if a filter wrench is not available. Towels or something else absorbent is also recommended to wipe up any water that drips. New O-rings may be needed, so it is good to have those on hand as well. You will also need a pressure gauge and an air pump of some sort. A bicycle pump will work fine. Of course, you will also need your under sink water filter.
Turn Off the Water Supply
Before removing any parts, turn off any valves that allow water to flow. Start with the valve that supplies water to the cabinet. If you have a tank, turn off the tank valve next. Also turn off any valves on the lines or pipe that connect your system.
Bleed the Lines
Next, bleed the lines to reduce water pressure and let out as much water as you can. The easy way to do this is to turn on the faucet that connects to the water system and let the water flow out. Turn the faucet back off after the water stops flowing.
Change the Sediment Filter
If you have multiple cartridges in your system, the first cartridge is the sediment filter. Turn the cartridge housing to the left to loosen the housing. Remove the housing carefully since there will still be some water inside. Remove the sediment filter and pour out the remaining water. Rinse the housing if there is still sediment at the bottom. Wash it if it still looks dirty. Inspect the O-ring in the top of the housing. Replace it if it is damaged. If it seems dirty, clean it following the manufacturers instructions. Place the new sediment filter inside the housing. Screw the housing back onto the bracket. Tighten the housing until it is snug, but not so tight that the O-ring is over-compressed.
Change the Carbon Filter
Nearly all filters have carbon filters. If you have one filter on your system, it will probably be a carbon filter. If you have more, the filters after the first are likely to be carbon filters. The method for changing the carbon filter is almost the same as changing the sediment filter. Follow the same instructions until you get to the carbon filter removal. This time, you will need to inspect the filter cartridge.
The filter should have O-rings at each end of the cartridge. Make sure they are not still in the housing. If they are, when you place the new filter in the housing, there will be too many O-rings and the housing and cartridge will not fit. This could make your system leak and not filter correctly. Take note of the orientation of the carbon filter. Some will have a specific up and down end depending on the filter system. If there is an O-ring in the housing, remove it. Inspect the O-ring on the top of the housing like before and pour out the water. Remove the wrapping from the new carbon filter and place it in the housing in the correct orientation. Replace the housing and tighten until snug.
Adjust the Tank Pressure
If your system has a tank, check the tank pressure and adjust if needed. Remove the valve cover from your tank. Make sure the tank is empty before taking a reading to prevent false readings. Take a reading using a pressure gauge. Adjust the pressure to the recommended psi by bleeding the air or adding air using a pump. Take a final reading and replace the valve cover.
Turn the Water Back On
Open the valves to let the water start flowing again. Start with the main water valve at the back of the cabinet. Then open the valve on the tank and any lines on the filter system. Check for leaks. Hoses can get bumped or pulled when changing a filter. Tighten any loose hoses that are leaking. Allow the tank to pressurize. Run the water for a few minutes to get rid of any air in the system and to flush out any particles that may have been knocked loose or that will come off the fresh filters. After that, check for leaks one more time.
Extra Maintenance
O-rings should be replaced at least once a year. They can become brittle or broken. They can also compress too much and no longer provide an adequate seal. They should also be washed with hot soap and water if they look dirty. The housings can also be sanitized by using diluted bleach. Make sure the bleach is completely rinsed off before placing the housing back on the system.